 Honda CBR125RW - Service manual > Front/Rear Brake Caliper
FRONT BRAKE CALIPER
REMOVAL
Drain the brake fluid from the hydraulic system.
Remove the brake pads.
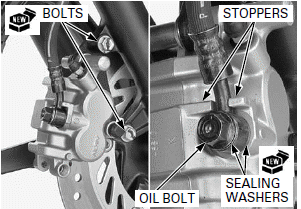
When removing the oil bolt, cover the end of brake hose to prevent contamination.
Remove the brake hose oil bolt, sealing washers and brake hose eyelet.
Remove the brake caliper mounting bolts and brake caliper/bracket assembly.
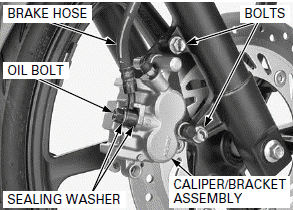
DISASSEMBLY
Remove the following:
- Caliper bracket
- Pin boots
- Pad spring
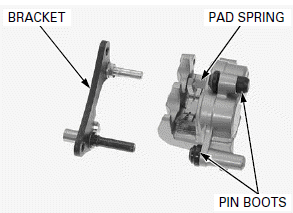
Place a shop towel over the pistons.
Do not use high pressure air or bring the nozzle too close to the inlet.
Position the caliper body with the piston facing down and apply small squirts of air pressure to the fluid inlet to remove the pistons.
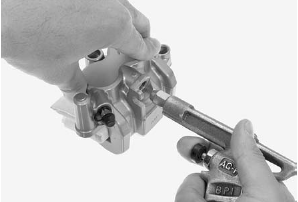
Be careful not to damage the piston sliding surface.
Push the dust and piston seals in and lift them out.
Clean the seal grooves, caliper cylinder and pistons with clean brake fluid.
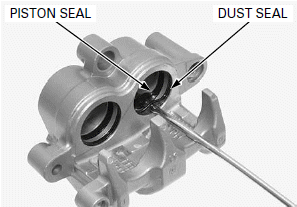
INSPECTION
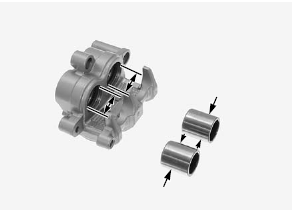
Check the caliper cylinders for scoring, scratches or damage.
Measure the caliper cylinder I.D.
SERVICE LIMIT: 25.460 mm (1.0024 in)
Check the caliper pistons for scoring, scratches or damage.
Measure the caliper piston O.D.
SERVICE LIMIT: 25.310 mm (0.9965 in)
ASSEMBLY
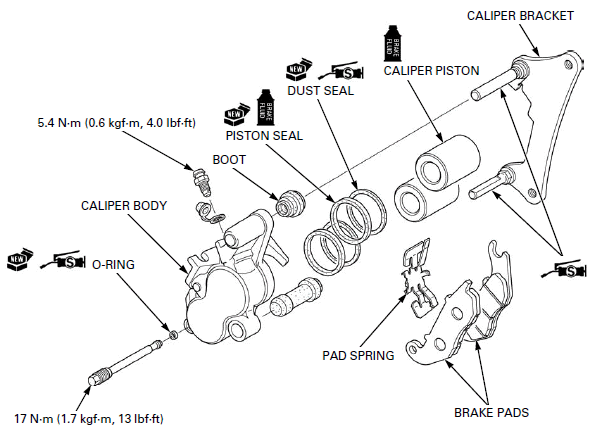
Apply brake fluid to new piston seals.
Apply silicone grease to new dust seals.
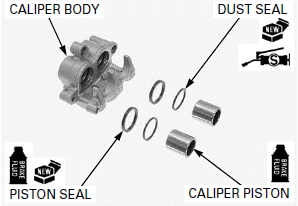
Install the piston and dust seals into the seal grooves in the caliper body.
Apply brake fluid to the caliper pistons sliding area and install them into the caliper cylinders with the opening side toward the pad.
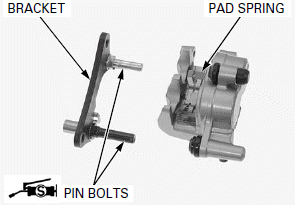
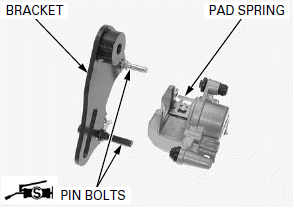
Install the pad spring onto the caliper body.
Apply silicone grease to the brake caliper pin bolt sliding surface.
Install the caliper bracket to the caliper body.
INSTALLATION
Install the brake caliper/bracket assembly to the right fork leg.
Install new mounting bolts and tighten them to the specified torque.
TORQUE: 30 N-m (3.1 kgf-m, 22 lbf-ft)
Install the brake hose eyelet between the stoppers with brake hose oil bolt and new sealing washers.
Tighten the brake hose oil bolt to the specified torque.
TORQUE: 34 N-m (3.5 kgf-m, 25 lbf-ft)
Install the brake pads.
Fill the reservoir to the upper level and bleed the front brake system.
REAR BRAKE CALIPER
REMOVAL
Drain the brake fluid from the hydraulic system.
Remove the brake pads.
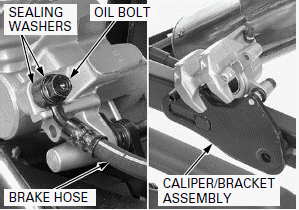
When removing the oil bolt, cover the end of brake hose to prevent contamination.
Remove the brake hose oil bolt and sealing washers.
Remove the rear wheel.
Remove the brake caliper/bracket assembly from the swingarm.
DISASSEMBLY
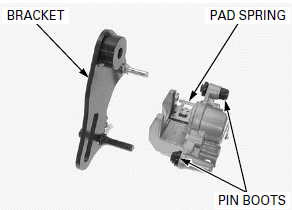
Remove the following:
- Caliper bracket
- Pin boots
- Pad spring
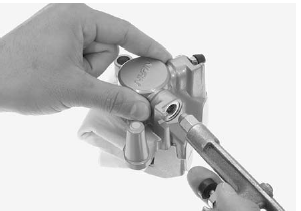
Place a shop towel over the piston.
Do not use high pressure air or bring the nozzle too close to the inlet.
Position the caliper body with the piston facing down and apply small squirts of air pressure to the fluid inlet to remove the piston.
Be careful not to damage the piston sliding surface.
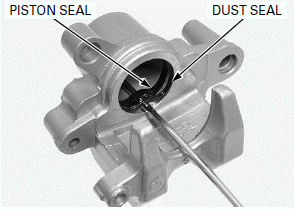
Push the dust and piston seals in and lift them out.
Clean the seal grooves, caliper cylinder and piston with clean brake fluid.
INSPECTION
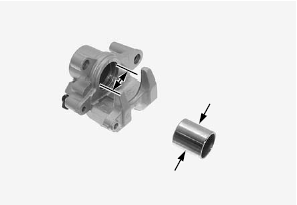
Check the caliper cylinder for scoring, scratches or damage.
Measure the caliper cylinder I.D.
SERVICE LIMIT: 32.090 mm (1.2634 in)
Check the caliper piston for scoring, scratches or damage.
Measure the caliper piston O.D.
SERVICE LIMIT: 31.940 mm (1.2575 in)
ASSEMBLY
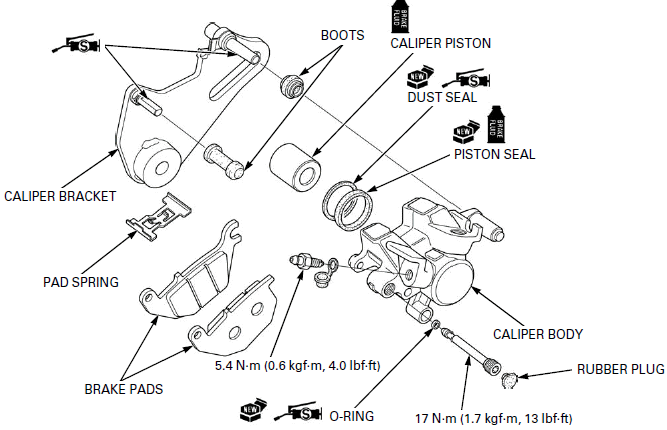
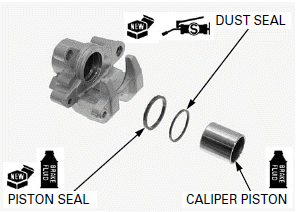
Apply brake fluid to new piston seals.
Apply silicone grease to new dust seals.
Install the piston and dust seals into the seal grooves in the caliper body.
Apply brake fluid to the caliper piston sliding area and install them into the caliper cylinder with the opening side toward the pad.
Install the pad spring onto the caliper body.
Apply silicone grease to the brake caliper pin bolt sliding surface.
Install the caliper bracket to the caliper body.
INSTALLATION
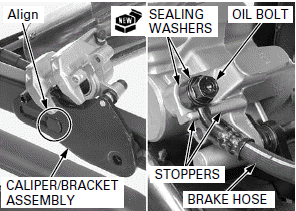
Install the brake caliper/bracket assembly to the swingarm by aligning the slot of the bracket and boss of the swingarm.
Install the rear wheel.
Install the brake hose eyelet between the stoppers with brake hose oil bolt and new sealing washers.
Tighten the brake hose oil bolt to the specified torque.
TORQUE: 34 N-m (3.5 kgf-m, 25 lbf-ft)
Install the brake pads.
Fill the reservoir to the upper level and breed the rear brake system.
BRAKE PEDAL
REMOVAL
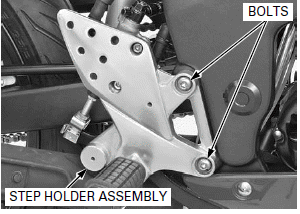
Remove the step holder mounting bolts and right step holder assembly.
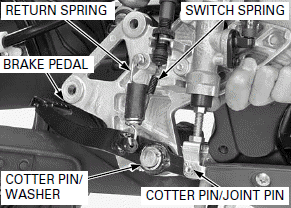
Unhook the brake light switch spring from the brake pedal return spring.
Remove and discard the brake pedal joint cotter pin.
Remove the joint pin and disconnect the push rod lower joint from the brake pedal.
Remove the cotter pin, washer, return spring and brake pedal.
INSTALLATION
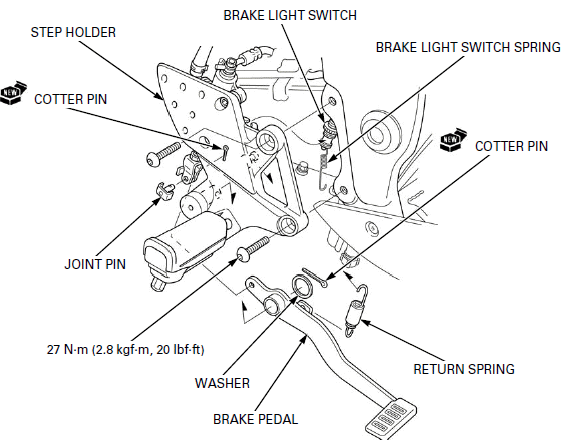
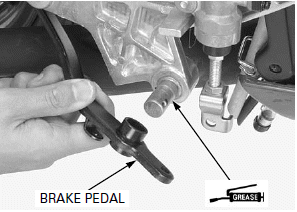
Apply grease to the brake pedal pivot sliding area and install the brake pedal into the right step holder.
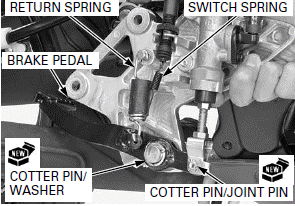
Secure the brake pedal with the washer and new cotter pin.
Connect the brake pedal to the push rod lower joint.
Install the joint pin and new cotter pin.
Install the brake light switch spring to the brake pedal return spring as shown.
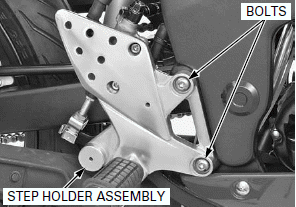
Install the right step holder assembly.
Install and tighten the step holder mounting bolts to the specified torque.
TORQUE: 27 N-m (2.8 kgf-m, 20 lbf-ft)
After the installation, check the brake operation and adjust the rear brake light switch operation.
See also:
 Honda CBR125RW - Service manual > Front/Rear Master Cylinder
FRONT MASTER CYLINDER REMOVAL Drain the brake fluid from the hydraulic system. Remove the right rearview mirror. When removing the oil bolt, cover the end of the brake hose to prevent contamination.

 BMW G310GS
 Honda CBR125RW
 Husqvarna 401 Vitpilen
 KTM 890 Duke R
 Mash Dirt Track 650
 Peugeot Kisbee
 Yamaha Tracer MT-09
 Honda CBR125RW
 Peugeot Kisbee
 Yamaha Tracer MT-09