 Honda CBR125RW - Service manual > Steering Stem
REMOVAL
Lift and support the fuel tank.
Open the rubber sheet.
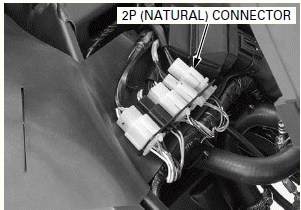
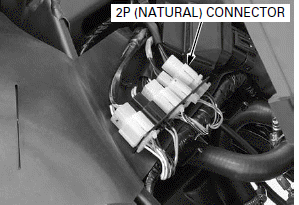
Disconnect the ignition switch 2P (Natural) connector.
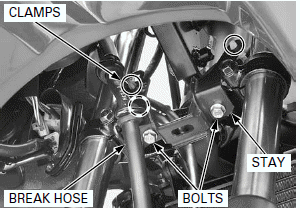
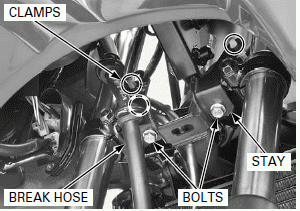
Release the brake hose and wire harness clamps from the stay.
Remove the bolts and stay.
Remove the suitable support and close the fuel tank.
Loosen the steering stem nut.
Remove the fork legs.
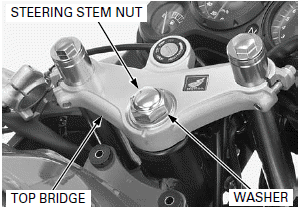
Remove the steering stem nut, washer and top bridge.
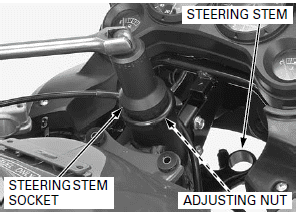
Loosen the steering stem adjusting nut using a special tool.
TOOL: Steering stem socket 07916-3710101
Hold the steering stem and remove the steering stem adjusting nut.
Be careful not to loose the steel balls.
Remove the following:
- Upper bearing inner race
- Upper steel ball (18)
- Steering stem
- Lower steel ball (18)
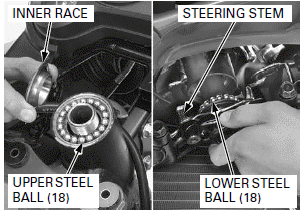
BEARING REPLACEMENT
Replace the steel balls, outer and inner races as a set.
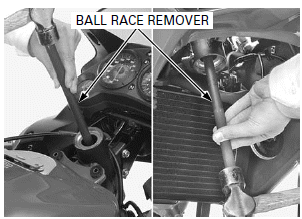
Drive out the upper and lower outer races using a special tool.
TOOL: Ball race remover 07GMD-KS40100
Temporarily install the steering stem nut onto the steering stem to prevent the threads from being damaged when removing the lower inner race from the steering stem.
Remove the lower inner race with a chisel or equivalent tools, being careful not to damage the steering stem.
Remove the steering head bearing dust seal.
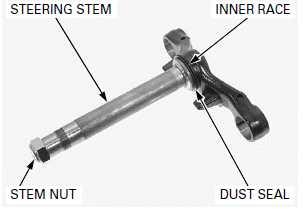
Apply specified grease to a new steering head bearing dust seal lips and install it to the steering stem.
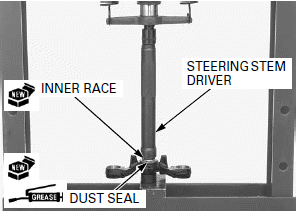
Install a new lower inner race using a hydraulic press and special tool.
TOOL: Steering stem driver 07946-4300101
Drive in a new upper outer race using the special tools.
TOOLS:
Driver 07749-0010000
Attachment, 42 x 47 mm 07746-0010300
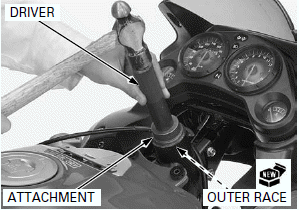
Drive in a new lower outer race using the special tools.
TOOLS:
Driver 07749-0010000
Attachment, 42 x 47 mm 07746-0010300
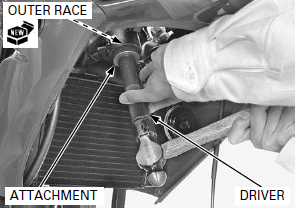
INSTALLATION
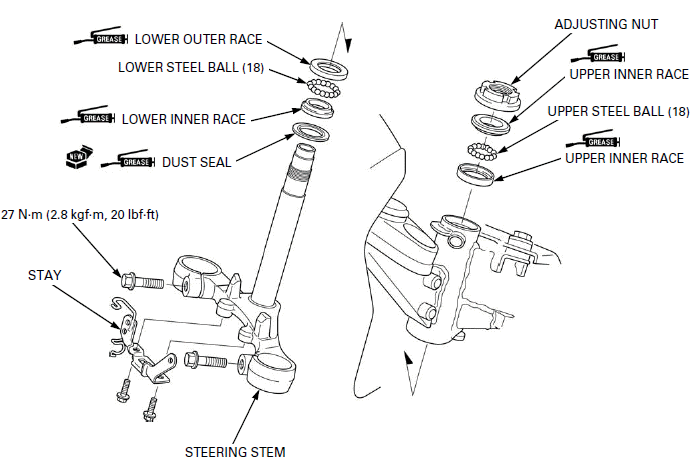
Apply specified grease to each inner races and outer races rolling surface.
Install the steel balls in the lower inner race and upper outer race.
Upper steel ball: 18 Pieces
Lower steel ball: 18 Pieces Install the steering stem and upper inner race.
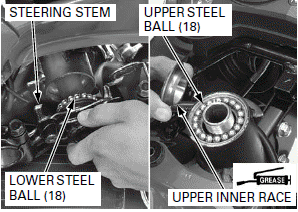
Install and tighten the steering stem adjusting nut to the specified torque using a special tool.
TOOL: Steering stem socket 07916-371
TORQUE: 27 N-m (2.8 kgf-m, 20 lbf-ft)
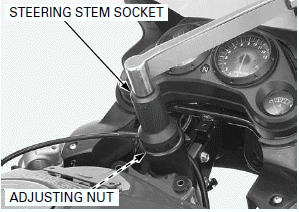
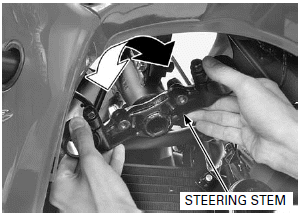
Move the steering stem left and right, lock-to-lock five times to seat the bearings.
Loosen the adjusting nut to torque of 0 N-m (0 kgf-m, 0 lbf-ft).
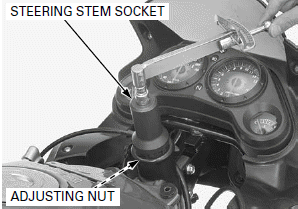
Retighten the adjusting nut to the specified torque using a special tool.
TOOL: Steering stem socket 07916-371
TORQUE: 1.0 N-m (0.1 kgf-m, 0.7 lbf-ft)
Install the top bridge.
Install the washer and steering stem nut, but do not tighten the steering stem nut yet.
Install the fork legs.
Tighten the steering stem left and right, lock-to-lock several times to make sure the steering stem nut to the specified torque.
TORQUE: 88 N-m (9.0 kgf-m, 65 lbf-ft)
Turn the steering stem left and right, lock-to-lock several times to make sure the steering stem moves smoothly without play or binding.
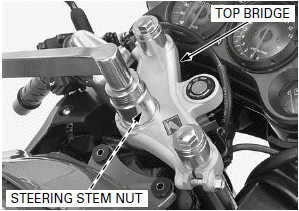
Route the wires, hose and cable properly.
Install the stay and bolts, tighten the bolts.
Install the wire harness clamps and brake hose to the stay.
Lift and support the fuel tank.
Connect the ignition switch 2P (Natural) connector.
Close the rubber sheet.
Remove the suitable support and close the fuel tank.
CLUTCH LEVER
REMOVAL/INSTALLATION
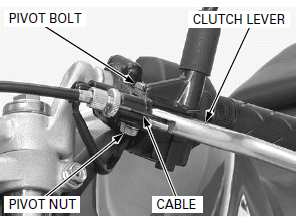
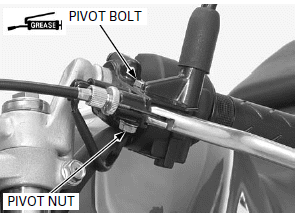
Remove the clutch lever pivot nut and bolt.
Remove the clutch lever and disconnect the clutch cable.
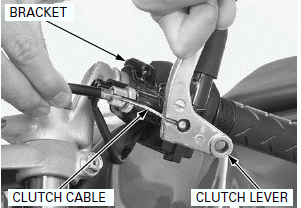
Connect the clutch cable to the clutch lever.
Install the clutch lever to the clutch lever bracket.
Apply grease to the clutch lever pivot bolt sliding surface.
Install and tighten the clutch lever pivot bolt to the specified torque.
TORQUE: 1.0 N-m (0.1 kgf-m, 0.7 lbf-ft)
Install and tighten the clutch lever pivot nut to the specified torque while holding the clutch lever pivot bolt.
TORQUE: 6.0 N-m (0.6 kgf-m, 4.4 lbf-ft)
See also:
 Honda CBR125RW - Service manual > Fork
REMOVAL Remove the following: Front fender Front wheel Do not suspend the brake caliper/ bracket assembly from the brake hose. Do not twist the brake hose.
 Honda CBR125RW - Service manual > Rear Wheel/Suspension
COMPONENT LOCATION SERVICE INFORMATION

 BMW G310GS
 Honda CBR125RW
 Husqvarna 401 Vitpilen
 KTM 890 Duke R
 Mash Dirt Track 650
 Peugeot Kisbee
 Yamaha Tracer MT-09
 Honda CBR125RW
 Peugeot Kisbee
 Yamaha Tracer MT-09