 Honda CBR125RW - Service manual > Engine Oil
OIL LEVEL INSPECTION
Hold the motorcycle in an upright position.
Start the engine and let it idle for 3 - 5 minutes.
Stop the engine and wait 2 - 3 minutes.
Remove the oil filler cap/dipstick and wipe it clean.
Reinstall the oil filler cap/dipstick, but do not screw it.
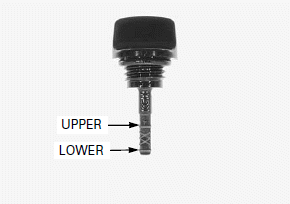
Remove the oil filler cap/dipstick and check the oil level.
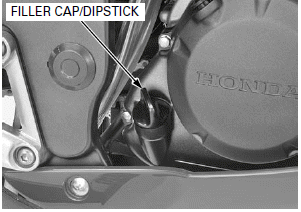
If the level is below the lower mark on the dipstick, fill the crankcase with recommended oil.
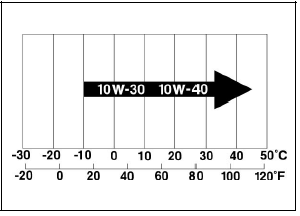
Other viscosities shown in the chart may be used when the average temperature in your riding area is within the indicated range.
RECOMMENDED ENGINE OIL (Except CM type):
Honda "4-stroke motorcycle oil" or an equivalent API classification:
SG or higher (except oils labeled as energy conserving on the circular API
service label)
JASO T 903 standard: MA
Viscosity: SAE 10W-30
RECOMMENDED ENGINE OIL (CM type only):
Pro Honda GN4 4-stroke oil or equivalent motor oil API service
classification: SG or Higher
JASO T 903 standard: MA
Viscosity: SAE 10W-30
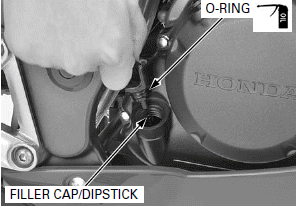
Check that the O-ring is in good condition, replace it if necessary.
Apply engine oil to the O-ring and install it to the filler cap/dipstick.
Install the oil filler cap/dipstick.
ENGINE OIL CHANGE
Warm up the engine.
Stop the engine and remove the oil filler cap/dipstick.
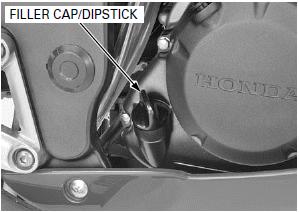
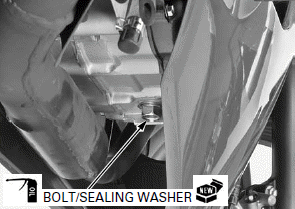
Place an oil pan under the engine to catch the engine oil, then remove the drain bolt/sealing washer.
Drain the engine oil completely.
Install a new sealing washer onto the drain bolt.
Apply engine oil to the drain bolt threads and seating surface.
Install and tighten the drain bolt/sealing washer to the specified torque.
TORQUE: 25 N-m (2.5 kgf-m, 18 lbf-ft)
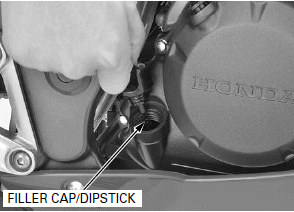
Fill the engine with the recommended engine oil.
ENGINE OIL CAPACITY:
1.0 liter (1.1 US qt, 0.9 Imp qt) at draining
1.3 liters (1.4 US qt, 1.1 Imp qt) at disassembly
Install the oil filler cap/dipstick.
Check the oil level.
Make sure there are no oil leaks.
ENGINE OIL STRAINER SCREEN
REMOVAL/INSTALLATION
Be careful not to damage the oil strainer screen.
Remove the right crankcase cover.
Pull the oil strainer screen out of the crankcase.
Wash the oil strainer screen thoroughly in non-flammable or high flash point solvent until all accumulated dirt has been removed.
Blow dry it with compressed air to clean completely.
Before installing the strainer, it should be examined closely for damage, and make sure the sealing rubber is good condition.
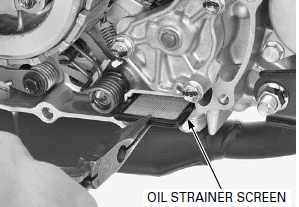
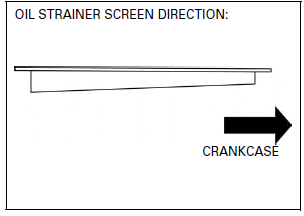
Install the oil strainer screen with the thin edge facing in and flange side facing up as shown.
Install the right crankcase cover.
RADIATOR COOLANT
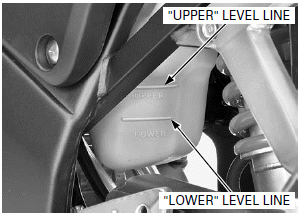
Check the coolant level of the reserve tank with the engine running at normal operating temperature.
The level should be between the "UPPER" and "LOWER" level lines with the motorcycle in an upright position.
If necessary, add recommended coolant.
RECOMMENDED ANTIFREEZE (Except CM type): High quality ethylene glycol antifreeze containing silicate-free corrosion inhibitors
RECOMMENDED ANTIFREEZE (CM type only): Pro Honda HP coolant or equivalent high quality ethylene glycol antifreeze containing silicate-free corrosion inhibitors
Remove the single seat.
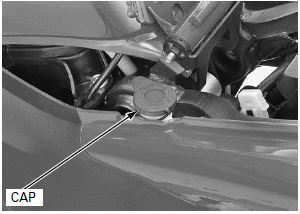
Remove the reserve tank cap and add the coolant to the "UPPER" level line with a 1:1 mixture of distilled water and antifreeze.
Reinstall the reserve tank cap.
Install the single seat.
Check to see if there are any coolant leaks when the coolant level decreases very rapidly.
If the reserve tank becomes completely empty, there is a possibility of air getting into the cooling system.
Be sure to remove any air from the cooling system.
COOLING SYSTEM
Remove the middle cowl.
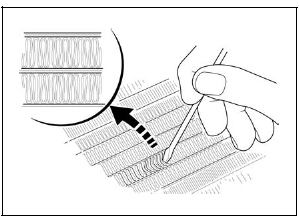
Check the radiator air passages for clogging or damage.
Straighten bent fins, and remove insects, mud or other obstructions with compressed air or low water pressure.
Replace the radiator if the air flow is restricted over more than 20 % of the radiating surface.
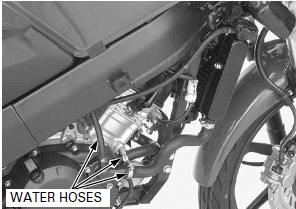
Inspect the water hoses for cracks or deterioration, and replace them if necessary.
Check the tightness of all water hose band screws.
See also:
 Honda CBR125RW - Service manual > Spark Plug
REMOVAL Disconnect the spark plug cap. Clean around the spark plug base with compressed air before removing the spark plug, and be sure that no debris is allowed to enter into the combustion chamber.
 Honda CBR125RW - Service manual > Drive Chain
DRIVE CHAIN SLACK INSPECTION Never inspect and adjust the drive chain while the engine is running. Turn the ignition switch OFF, support the motorcycle on its sidestand and shift the transmission into neutral.

 BMW G310GS
 Honda CBR125RW
 Husqvarna 401 Vitpilen
 KTM 890 Duke R
 Mash Dirt Track 650
 Peugeot Kisbee
 Yamaha Tracer MT-09
 Honda CBR125RW
 Peugeot Kisbee
 Yamaha Tracer MT-09